We recommend all new members to start with the Free package. This way you can start building your website, get used to the ArtWeb system and upgrade at any time if you ever wish to do so. The website design you create with the Free Package will not get lost when upgrading to a paid package.
To create a Free account:
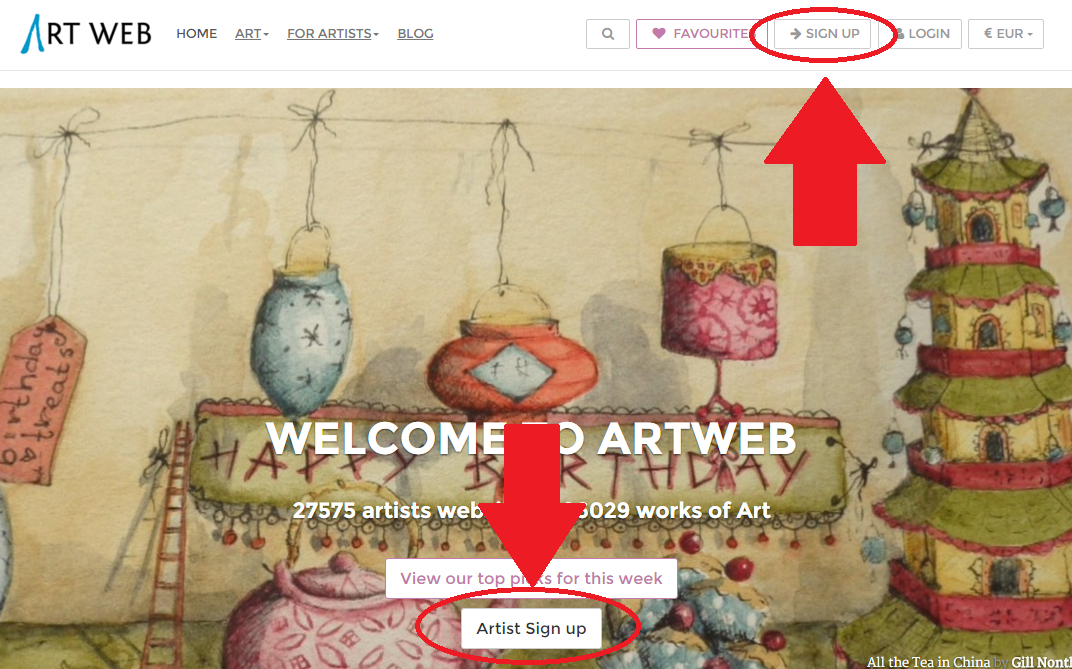
- Go to the ArtWeb main page here: https://www.artweb.com
- And click the ‘Sign Up’ button on top, or the 'Artist Sign Up' button in the middle (both go to the same page)
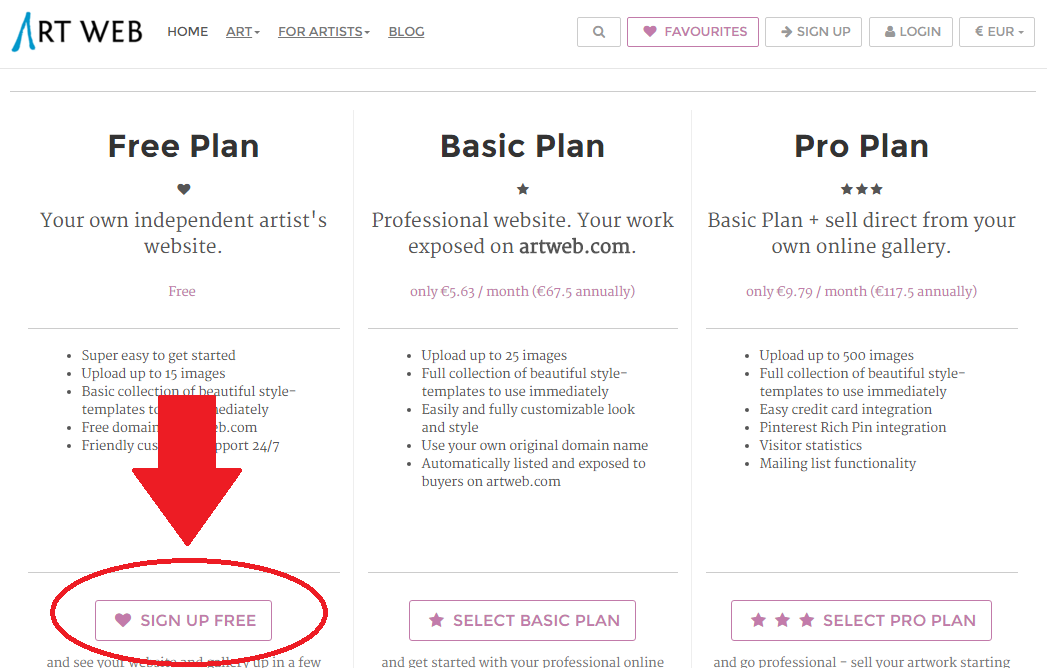
- Find the ‘Free Plan’ column on the left, scroll down and click the ‘Sign Up Free’ button
or
- Go straight to the sign up page here: https://www.artweb.com/register/artist/free
- Fill in the signup form and click the ‘Register’ button.
Success! You have now created an account! However your website isn’t online yet. You need to first select a layout and upload some art. To help you with this we made a 4 step start up process. You need to finish this process before your website will be launched. Here is what you’ll see:
![]()
- Click the 'Upload' button to upload your profile picture (click 'Skip this step' underneath the 'Save & Continue' button if you wish to do this later).
- Or use your Twitter avatar by putting in your Twitter username.
- When finished click 'Save & Continue' to go to the next step.
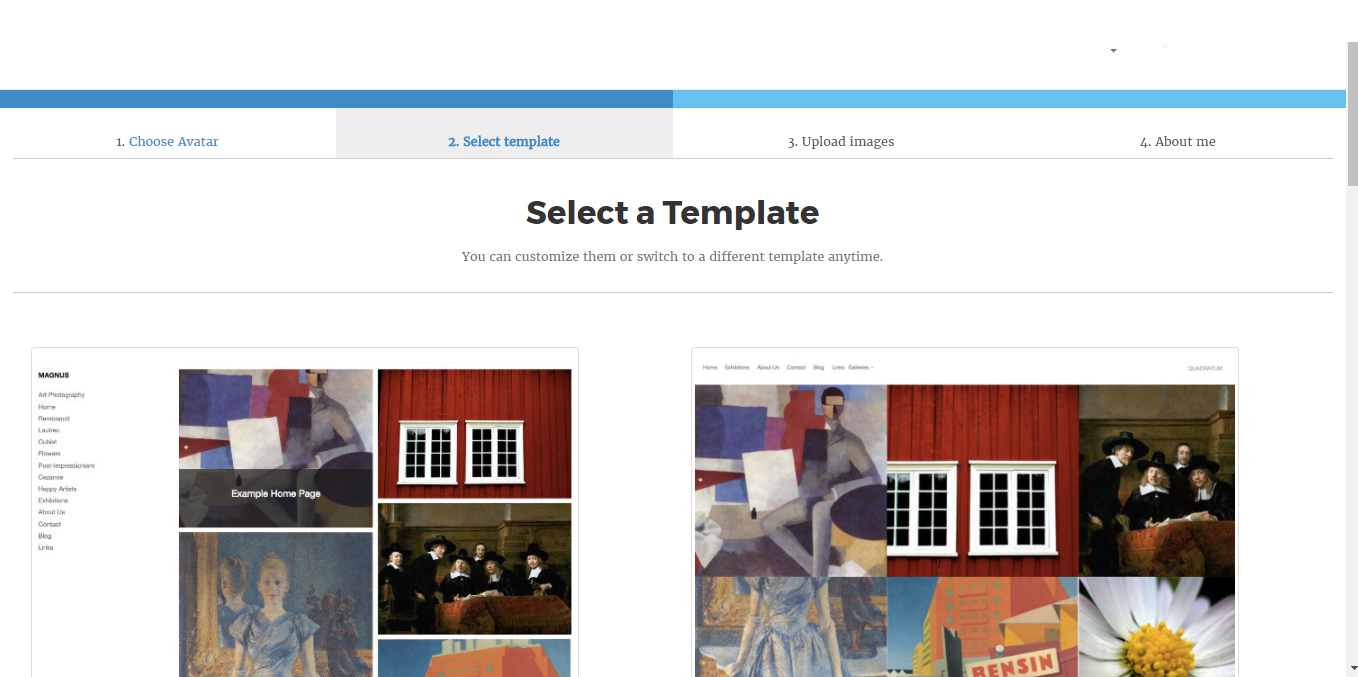
- Next you need to select a Template for your website. Scroll through the list of available templates and preview the ones you like best by clicking on it.
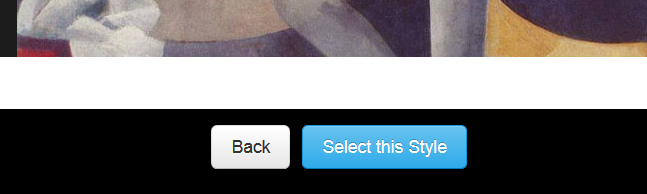
- You will now see a preview of the template. At the bottom are 2 buttons. Click the ‘Back’ button to go back to the list. Or click the ‘Select this Style’ button if you like the template and want to use it for your website.
- After clicking ‘Select this style’ you will see the following screen:
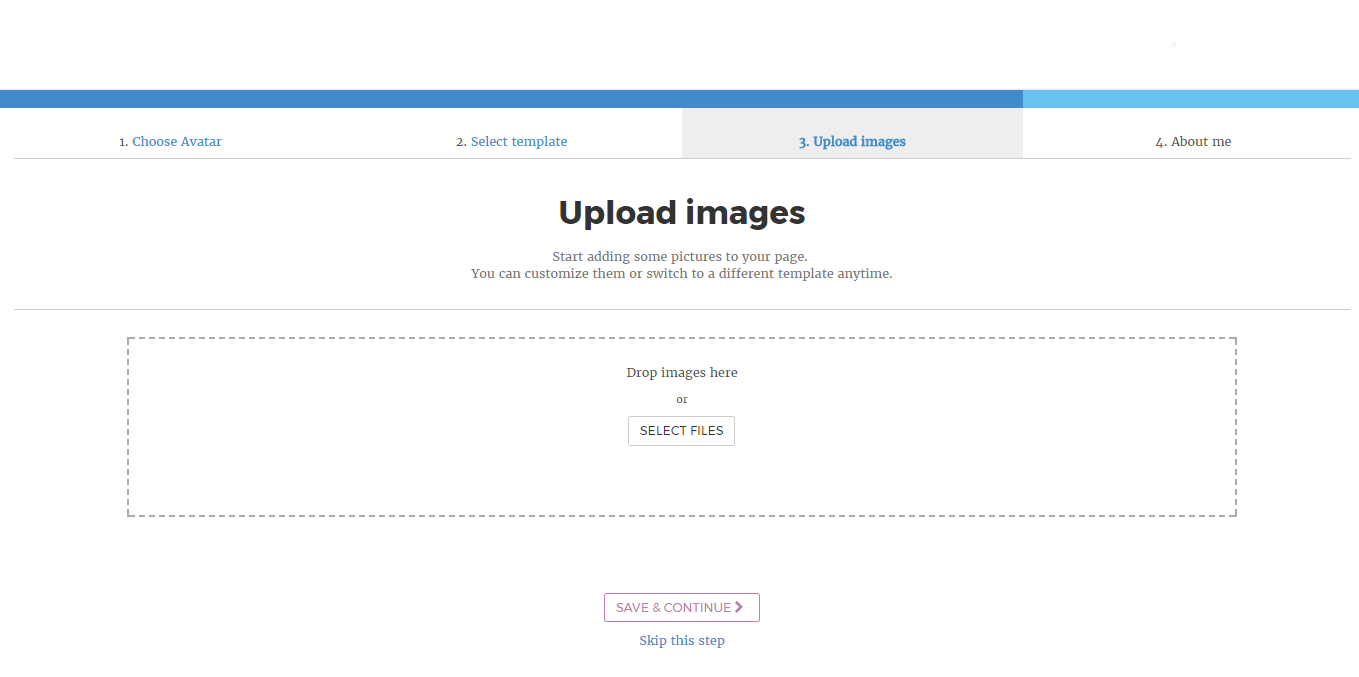
- Here you can upload the first images of your website. Click anywhere inside the big rectangle to open the images selection panel. Or simply drag some images from your computer and drop them into the rectangle. You can add multiple images at once. Your images will start uploading.
- When the uploads are successful the screen looks like this:

- When finished uploading, scroll down and click the ‘Save & Continue’ button at the bottom.
- Now you will reach the final step. Add some information here about you and your art. It’s the first start of your ‘About Me’ page and some of your settings. Fill in the details and click the 'Save & Continue' button at the bottom.
- Congratulations! You’re finished with the start-up process and your website has been launched! Choose here if you want to take a look at your website right away or if you first want to go to the Control Panel.
From now on whenever you login to your website you will go straight to the Control Panel. This is where you can edit all the details of your website and change anything you created on your website.
If you need any further assistance at this point, click the ‘Help’ button in the menu on the left side of your control panel.
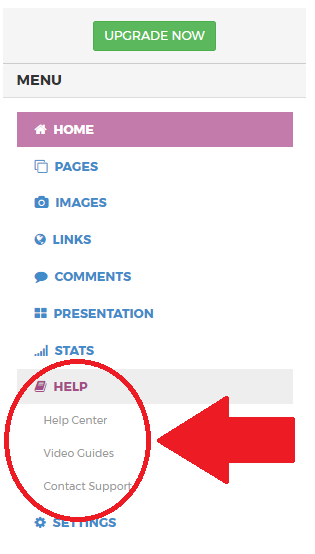
- Click ‘Help Center’ to search our FAQ articles
- Click ‘Video guides’ to view videos of the most commonly performed actions in the Control Panel
- Click ‘Contact Support’ to send us a question with anything you are struggling with
- Or you can email us directly at support@artweb.com
Comments